Saturday, March 26, 2011

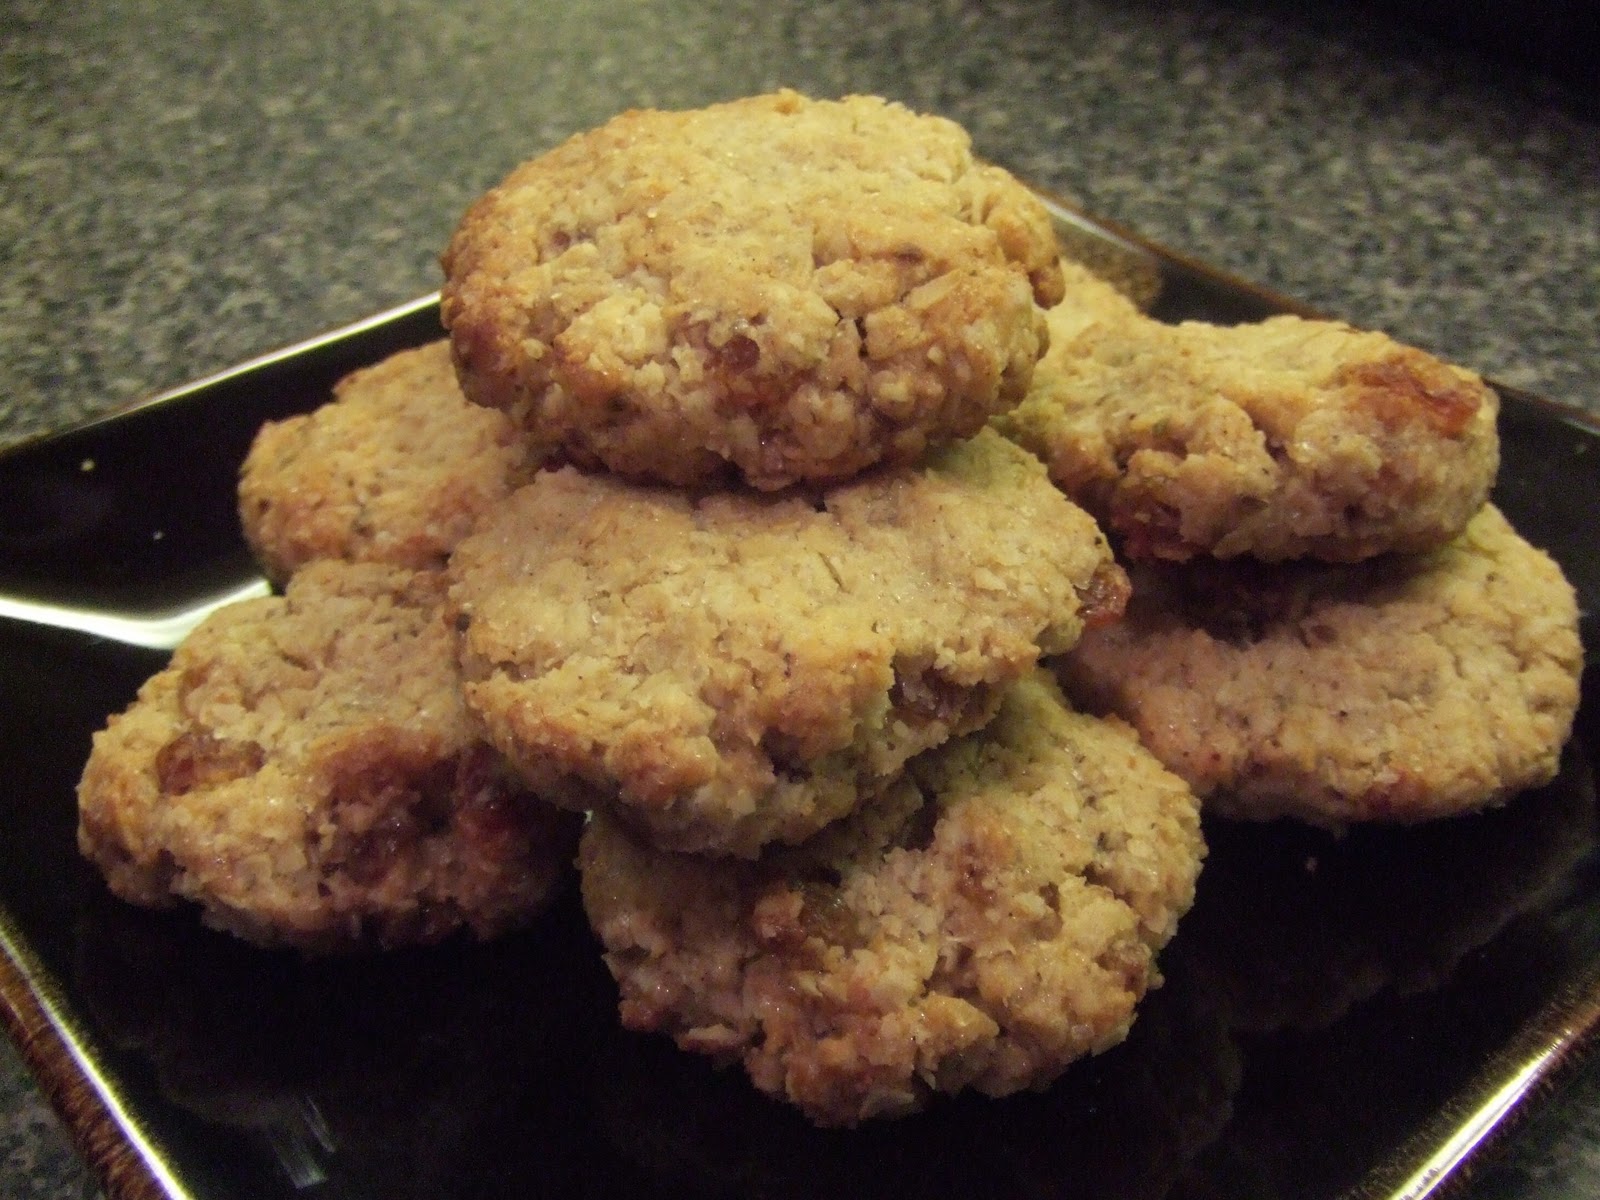
Oat Crisp Cookies


I have sampled my share of vegan cookies over the years and I have to say that most of the ones bought in stores tend to be a little heavy and doughey, until I discovered these little jewels. Light and cripsy on the outside and tender in the middle. Not too sweet, just the right amount of fat. They remind me of Anzacs, those Australian cookies but less sweet. Like all good things, one or two does the trick. 

INGREDIENTS:
1 cup of quick oatmeal
1/2 cup pastry flour
1/2  tsp baking powder
1/2 cup of unsweetened coconut powder
1/3 cup of sugar
1/2 cup of oil
2 Tb soy milk
1/2 cup raisin
1 tsp cinamon
1 tsp ginger
1 tsp anis seeds (optional)
  1. Mix all dry ingredients together, then add the wet ones.
  2. Line a baking sheet with parchment paper.
  3. Make little mounds and flatten them.
  4. Bake at 390F for 10-12 minutes until they are lightly browned.
Enjoy and share!

Tuesday, March 22, 2011

CROSTINI DI POLENTA (Polenta sticks)

Pronounced "Po-len-tah", this native dish of Italy is made with ground yellow or white cornmeal. Unlike grits, which is corn that has been soaked and processed to remove the tough outer hull, polenta has the hull and is therefore more nutritious and less processed.

If you are tired of rice, pasta, quinoa or other grains, you can make something really good with this simple stapple. Try to buy organic cornmeal because 80% of the corn grown in the US is genetically modified to be fed to cattles and other farm animals (there isn't enough grazing land to feed 10 billion of them!) Come to think of it, it is outrageous that this ancient plant native to the Americas, that was available in so many diverse types has been reduced to a patented engineered seed that has taken over the market.  Don't get me started on this!


But I digress, what is nice about it, is that you can make it in all different ways. You can serve it soft like mash potatoes for a rustic meal (a little like grits). Want to impress your guests? Make thick slices, balls, patties or sticks for an appetizer. Can you see the possibilities?

It is quite versatile, you can serve it with your favorite sauces, maybe a tomato sauce, a curry or mushroom cream sauce. In the photo, I simply pan fried it until it is golden brown and crispy and served it with a dipping sauce. You can also grill it. You can even serve it sweet for breakfast on a cold winter day. When cooked polenta takes on a smooth, creamy texture But don't stop there, pour it into a dish, let it cool off. Then you can slice it. 

TYPES OF POLENTA
There are 2 kinds of polenta (cornmeal). Most stores carry the regular kind but you can sometimes also find instant polenta, which cooks much faster. I don't mind using the regular kind, because I am in the kitchen usually preparing the sauce while it cooks. This way, it is nice, cooks over medium heat. No rush, no stress. That's my motto and I am sticking to it!

COOKING THE POLENTA
Similar to other grains, you need to boil water, add salt and grain, and simmer until tender (approximately 30-45mn). The ratio for the basic recipe is 3 parts liquid to 1 part polenta. You will need to stir every 10mn to keep it from sticking or turning lumpy. If you want a softer result, add a little more water.

Basic ingredients are:
    3 cups water
   1 tsp. salt
   1 Tb vegan butter
   1 cup uncooked polenta


NOTE: For fancier versions, you can use vegetable or mushroom broth, instead of water.
You can also add spices, herbs, chopped olives to change its flavor and appearance (you can see the herbs in the close-up photo above).
Get creative.
When the polenta is cooked, transfer it to a greased loaf pan.
Let it cool off for a few hours or refrigerate, then cut the polenta into slices.
You can either pan fry it or use an electric grill (like in the photo) and grill the sticks with very little oil for a low fat version. That's pretty cool.
Serve with your favorite dipping sauce.
E tutto (that's it, in Italian!)
Buon appetito!

Sunday, March 13, 2011

TARTE AU CITRON (Lemon Tart)

This is a wonderful refreshing summer desert but it must be the lack of sun this time of the year that made me crave for lemons. I tried the lemon bar recipe from Isa Chandra Moskowitz's Veganomicon and made it into a tart.
Oh My God, it came out soooo good!
So I thought I had to share it with everyone. One thing though, I wouldn't recommend it for people with high blood sugar, because the sugar content isn't exactly low but if it is totally worth it as long as it is consumed in moderation! That's my story and I am sticking to it!


Ingredients for the pie crust:
  
   1¼ cup all-purpose flour
   2/3 cup confectioner sugar
   1 cup vegan butter
   1 tsp tahini (optional)
   pinch sea salt
   water

  1. Combine the vegan butter with the flour, sugar, salt and tahini until it forms a coarse mixture. 
  2. Add a little water to form a dough. Place in a plastic bag or in some plastic wrap.  
  3. Refrigerate for one hour.
  4. Roll out the dough into pie pan and bake at 350F for 25mn then let it cool down.
Start preparing the filling:

1½ cup water+ 3-4 Tbl agar agar flakes or powder*
1¼ cups sugar
½ Ts turmeric
3/4 cup fresh lemon juice
3 Tb arrowroot powder
1 Tb freshly grate lemon zest

To create the texture of a lemon tart, you need something that will create a jello like texture. That's where the agar agar comes in.
  1. Place the agar agar (flake or powder) in water and let it dissolve for a few minutes.
  2. Juice your lemons, add the arrowroot into it and mix it.
  3. Bring the agar agar and water to a boil and mix until it is totally dissolved (2-3mn), add the sugar, turmeric and continue stirring for a few minutes under medium heat.
  4. Add the arrowroot mixture and soy milk and continue stirring until it gets thick. Immediately pour into the pie crust and let it rest for 30mn. 
  5. When it is cooled enough to touch, place in the refrigerator for 3-5 hours or better overnight.

* agar agar is a vegetarian gelatin substitute made from a variety of seaweed. It comes in flakes and powder. It is a stabilizing and thickening agent for custards, puddings and sauces. Simply dissolve it by boiling it in water, then let it set in the refrigerator. It can be purchased at health food stores, Asian grocery stores. It is very cheap and keeps forever. You will be amazed at the results!

Monday, March 7, 2011

MY NEW ANTHEM

A dearest friend sent me this short video a few days ago and it has been playing in the back of my mind ever since and has been a source of great joy, comfort and hope. So I thought I would share it with you.


Even though this isn't directly related to cooking or food, it certainly qualifies as spiritual food and while we may have plenty of the former, we sure can all use more of the later. 
Don't forget to turn up the volume! 
Enjoy.


Now that you have heard the song and read the lyrics, you can watch this one. It was filmed in Thailand and well, let's just say that it is at a slightly larger scale. By the way, if you wander who is this handsome man standing, he is the song writer. What a gift for him and for all of us!
You will see what I mean.


Can you see all the children, all the nations, all together?
I can. It is up to each and everyone of us to hold the image and the intention, the rest will follow.
It is the law of the universe, energy follows thought. 
And we all thought, this was the end times!
I guess it all depends how you looks at things!

SEARED PORTOBELLO MUSHROOMS WITH MASHED POTATOES


This dish brings the strength and flavors of the earth to your table through the mushrooms and the potatoes, both living in and from the soil. Portobellos are great meat substitute because of their texture. You can use them in burgers, sandwiches, soups and so much more. This dish may look fancy but it isn't very complicated to prepare.
It is highly flavored but low fat. It was inspired by a lovely dish I had at one of my favorite vegan restaurants in Portland called "Portobello Trattoria". I just found out that in addition to being organic and vegan, they also only serve local and seasonal products and do not buy any products made by large corporations! That's something.


But I digress...Living in the Northwest, I now have access to an amazing choice of wild mushrooms. And you know what this  means? Lots of mushrooms dishes coming! Yum! And since mash potatoes are always hit at home, why not combining them but in an elegant way.

INGREDIENTS:

4 large potatoes (2 per person usually)
2 Portobello mushrooms (1 per person)
1/2 cup sliced green onions
1 Tbl Balsamic vinegar
Garlic (2 cloves)
1 cup of water with mushroom broth (comes in cubes or powder)
2 cups snow peas
Salt, pepper

PREPARATION:
  1. In a large pot, boil some water with salt and add the potatoes. Make sure there is enough water to cover them well. Cook until tender but not mush.
  2. Gently rince the portobello mushrooms to remove debris and slice them not too thin or the slices will fall apart when cooked. Have you ever noticed that the slices look just like the tail of a whale as it dives down in the ocean? If you have young kids around the house, this should get them entertained while you are preparing the meal!
  3. Mince the garlic.
  4. Pour hot water over mushroom broth or dry mushrooms, cover and set aside.
  5. In a non-sticky frying pan, heat up a teaspoon of oil, add the minced garlic and the  green onions on top. Quickly move around the pan over medium heat so that it doesn't burn. Place the slices of Portobello mushrooms in the pan without overlapping them. You may need 2 pans to do this, depending on how many mushrooms you are preparing. Drizzle a little balsamic vinegar making sure that you have some on every pieces and sprinkle a dash of salt. The vinegar will bring the sweetness out and caramelize them. Gently shake the pan so that nothing sticks and the juices are well mixed. Flip each slice and place a lid on top and lower the heat. You can remove from the heat when the juices have been lightly reabsorbed. Set aside covered.

MAKING MASHED THE POTATOES
When the potatoes are cooked, with the help of a slotted spoon, scoop out the potatoes and place them in a blender, pour a little of the mushroom broth, some salt and pepper (garlic powder). Blend slowly at first, push down the potatoes if they need a little help, add broth very sparingly otherwise it will be too mushy and wet. Taste and season as you like.
Now, who said you had to put a lot of butter in your mash potatoes to make them taste good? All you have to do is use some of the cooking water instead of milk and just a little of vegan butter when you serve it. That's it!

CRISP THE PEAS
Heat up a tsp of oil in a frying pan, when hot, pour the snow peas and quickly move them around, sprinkle a little salt and you can also add a few Tbl of mushroom broth and cover for a minute. Lift the cover, let the steam come down. Mix well, remove from heat  and set aside on a plate.

PRESENTATION:
This is up to you. I used a soup plate, made a dome in the middle with the mash potatoes, layered the portobellos on top and garnished the sides with the snap peas. Bon appétit!

NUTRITIONAL FACTS:
A serving of mushroom has no cholesterol, 5 mg sodium and 2.1 g protein. A 2/3 cup serving of Portobello mushrooms has as much potassium as a banana and good calcium too and only 26 calories per mushroom.


Monday, February 28, 2011

TOFU SCRAMBLE, the Breakfast of Champions

Tofu Scramble
Sleeping in!
When Sunday comes and we get to sleep in a little and start the day more slowly, we usually feel a bit more hungry than usual. And the one thing that everyone seems to agree on is a nice tofu scramble. You can serve it with toasted bread (rye is great with it), some fresh vegetables on the side or if you have more time, make some pan-fried potatoes for a true American classic. And if you really want to be decadent, serve both bread and potatoes!

This is truly the easiest dish you can put together without even being fully awake. Which could easily happen on a Sunday morning... There is no way you can mess this one up.

Pretty much any vegetable you have in your refrigerator can be added to it (with the exception of root vegetables like carrots that would need a little tenderizing first). The trick is to dice everything pretty small so that you barely cook your vegetables, get a nice crisp texture and get most of the nutrients in the process. I like to have different kinds of greens and red veggies for the visual effect and whatever fresh herbs I have on hand (dried will work fine too). The usual culprits we have at home are zucchinis, snow and snap peas, green onions, green beans, mushrooms, tomatoes... we usually stay away from bell peppers because a lot of people don't digest them well.


BASIC INGREDIENTS:
  •    1 package of organic* firm tofu drained on a towel
  •    2-4 Tbl nutritional yeast
  •    1 tsp or more of turmeric** for color (turmeric does have a unique flavor, so experiment with a little at first,  then add more if you want a deeper yellow color).  
  •    1 tsp or more of garlic and onion powder
  •    1/2 cup green onions minced
  •    1 tsp ground flax seed (optional)
  •    Vegan cheese like Daiya (optional)
  •    Combination of vegetables finely diced
  •    Fresh herbs (Basil or cilantro) optional 

PREPARATION:
  1. With clean hands, break the tofu in a bowl to loosen up the pieces.
  2. I prefer not leaving large chunks as they tend to not absorb as much flavor and come out bland. We like all our bites to be equally flavored!
  3. Sprinkle the yeast first and mix,  then the turmeric, garlic and onion powder and salt, mix some more.
  4. Add the green onions and other dried herbs of your liking.
  5. Heat up a large frying pan with 1 tsp of oil, making sure the oil is evenly coating the pan
  6. Pour the tofu mixture and gently stir over medium heat.
  7. You can start toasting the bread or preparing the salad while this is cooking because it doesn't take much time to finish the scramble at this point.
  8. Now add the finely diced vegetables, mix well and cook a few more minutes. Taste and add seasonings if you want. Sprinkle some vegan cheese, turn of the heat and cover with a lidd.
  9. Serve as mentioned at the top. Chop from fresh herbs available and place on top.
Bon appétit! So, this isn't a Julia Child fancy dish but it does the trick every time.

SOME VARIATIONS:
If you are in a Mexican mood, add some salsa and chilis and serve with corn chips or a warmed tortilla and a side of black beans.
If you feel like adding an Indian touch, you could add some curry to the spices and eat with chapattis.

* Organic tofu is really important because a good part of the soy grown today is fed to livestock along with the all-pervasive corn (I swear, a cob of corn should be added to the American flag for the amount we are growing and consuming). So much of these two crops have been genetically modified and no serious clinical study was ever done on human population prior to introducing these new seeds. The reason being that since it would 'mostly' be given to animals and they seem to handle it just fine! I love the FDA's logic. If they can take it, why shouldn't we! The problem with GMO corn and Soy, but mostly corn is that it is in so many by-products today, that if the manufacturers were to label GMO ingredients on their products, the vast majority of the products sold in stores would have to list GMO ingredients and traces on their packaging. So Stick to organic when it comes to soy/tofu and for corn, good luck, this may be a little more difficult.
If you want to find out more about the largest producer of GMO products and how to protect yourself, click here.


** The active ingredient in turmeric is called curcumin. It is known for its antioxidant, anti-inflammatory, antibacterial, stomach-soothing, and liver-and heart-protecting effects.
In India, it is used to aid for digestive disturbances and as a treatment for fever, infections, dysentery, arthritis, jaundice and other liver problems
In China it is used to treat liver and gallbladder problems, stop bleeding, and relieve chest congestion and menstrual discomforts
Given that it not only improves blood circulation but also helps prevent blood clot, turmeric offers some protection against heart attacks and strokes, the biggest killers in the US.
For more information on this herb and how to use it, go to: http://www.nutritional-supplement-educational-centre.com/turmeric-benefits.html

Tofu scramble delivers an impressive 4.8g of dietary Fiber and 24.2g of protein per serving. Not bad!

Thursday, February 24, 2011

ODE TO THE SUNFLOWER SEED - The Mightiest Sprout of All!

I was blessed to be able to go to Haiti last year a week after the earthquake to help at a Seven day Adventist hospital. I was so touched to see people from all over the world that had temporary left what they were doing to lend a hand to the Haitian people in desperate time of need. The degree of strength (moral, physical, psychological), the resilience and grace I experienced while assisting Haitians patients was so humbling. We often complain about things that are not so important when placed in a larger context.

It reminded me of something that happened when I first arrived. I had sprouted several kinds of seeds and my favorite of all, sunflower seeds. They take a little longer to germinate than smaller seeds and you have to remove the hulls after a few days but they are totally worth the extra effort. So I had prepared some that were ready to consume and filled an entire small ziploc bag. Finding fresh food while traveling isn't obvious and I expected living on protein bars for the next few weeks. So I grabbed the bag right before leaving for the airport and threw it in my bag pack. I had a long trip ahead of me, 2 flights, 1 night lay over and a rough 8 hours bus ride across the border from the Dominican Republic to Port-au-Prince, my final destination. I grabbed a few handfuls while in the airport and threw the bag in my backpack and completely forgot about them until about 4 days after I got there. The bag of sprouts somehow ended up at the bottom of my backpack. I had to setup my tent, hit the ground running as soon as I got there. Now, imagine 90 to 95 degree heat, intense humidity, day and night. The kind of heat that gives you a skin rash just from wiping the sweat off your face so many times! 

So I woke up almost a week later, wondering what had happened to my bag of sprouts! I grabbed my backpack, threw everything out of it and found it at the bottom. I was ready to face a stinky mess of rotten sprouts all stuck together. But to my utter surprise, the sprouts were intact. I had taken the precaution to insert a piece or paper towel and leave some air in the bag so that they would be protected in my backpack. But that was a miracle! Not only did they look great but they tasted fantastic too!  (see bag on the right)


Sunflower sprouts are so strong, full of life, that even after having spent 4-5 days in the heat, in the dark at the bottom of a backpack, not only were they still alive, but they were striving, growing, bright green. That's pure life for you. They reminded me of the beautiful Haitian people. Strong, kind, patient, gracious and so resilient.

If I was stranded somewhere, the one thing I would bring with me is a bag of raw sunflower seeds. As long as I can find some water, I am good to go.
Sunflower seeds have a delicate flavor, a little peppery, slighthly salty but not too much.


HOW TO SPROUT SUNFLOWER SEEDS

Never use roasted seeds! Those are dead beyond measure. Only use raw hulled sunflower seeds.They are super cheap in the bulk section of grocery stores. 
Raw seeds are basically dormant. So the first step is to soak them (1 cup) overnight preferably in filtered water (3-4 cups). Mix well to make sure all seeds are wet. This washes off the enzyme inhibitor and brings the dormant seeds to life. It also turns them into a nutritional powerhouse.That's when the magic begins! It is virtually impossible to mess these up!
You can sprout them in a sprouting bag or in a jar. I used clear glass jars and cut out some window screen for a lid. To secure the top, I use the ring from the lid without the middle section to keep it in place. It is cheap and can be reused many times.


You will need to rinse them twice a day, in the morning and in the evening. I use a wooden dish rack to rest the jar at an angle. This helps draining the jar completely. Seeds will rot if they are not well drained.
 
After 3 days, you need to remove the shells. If you leave them, they will spoil and your sprouts will spoil quickly. This process is a little time consuming but relaxing. I usually do it while watching TV. I use one bowl with water and another one empty. Hold the seed in one hand, squeeze the sides to gently remove the seedling without breaking it. This process will speed up the growth of our seeds. It is a little like birthing a new life, one seed at a time.


I eat them by the handful, I also sprinkle them on top of salads.
They don't need anything really. If you are sprouting for the first time, start with mung beans (impossible to not to sprout), garbanzo beans, lentils, and of course our champion, sunflowers.

SOME PRECAUTIONS:
 
Storing the sprouts: They store best in your refrigerator if they are dry to the touch. So wait a few hours after the last rinse to refrigerate them. They can keep up to 2 weeks but it is better to sprout more often. It is so cool to do this in the winter when little grows in the garden.

Taking care of your sprouting equipment: it is good to disinfect the jars in between sprouting. Since I am not big on chlorine, I use pure cider vinegar. I scrub it with a toothbrush then rince the jar well to remove everything and let it dry upside down.

Dry seed storage: Seeds will last a long time if properly stored. You need a cool, Dry and Dark place. Seeds shelf life can be increase  4-5 times by freezing or at least double by refrigerating them.

If you want to learn more about sprouting, you can check out a few sites:
http://sproutpeople.org
http://www.sprouthouse.com/


Sunflower Sprouts Nutritional Info:
Sunflower sprouts are rich in Vitamins A, B, C and E
Calcium, Iron, Magnesium, Niacin, Phosphorus, Potassium
Protein: 25%

Not bad for a tiny seed.

Monday, February 21, 2011

VEGAN CHOCOLATE MOUSSE

I take no credit for this recipe but I did tweak it a little for some extra flavor. Everyone should know it.
This is the simplest pudding desert you will ever make. It requires no baking, no setting time, no refrigeration prior to eating. 

I call it, instant gratification!
You can beat 4 basic ingredients!


INGREDIENTS:
12 oz silken tofu
1/3 cup vegan chocolate powder
1/3 cup raw sugar or rice syrup
2 tsp vanilla
dash of salt
1 TBl orange jam* (optional)

NOTE: If you are not familiar with silken tofu, you can find it in the same section with the regular tofu in most grocery stores. It comes in small 12oz cardboard packages that keep well even if not refrigerated. Mori-Nu is made with non-genetically modified soy beans, so this is great. You can use it in shakes, as filler in cream pies, in dips for an extra velvety texture. Make sure to always have several on hands.
  
PREPARATION:

1. Mix the tofu and chocolate powder first in a bowl, add the vanilla, orange jam and salt.
2. Pour in a blender or processor and add the sweetener.
3. Blend until smooth.
4. Pour into a nice dish and serve.

* The orange jam will add more sweetness and a little tang. It will also bring the chocolate flavor out. You can also add 1 Tbl of coconut powder for extra flavor.

Makes 2 generous servings

Enjoy

Tuesday, February 15, 2011

MINI PEPPER QUICHE

I found an old back and white photo of my grandmother and I when I was 4 years old. It brought back many happy memories of her lovingly concocting all kinds of delicious dishes.  The colors, flavors and textures varying with the seasons. I had the all important job of official taster and spoon cleaner! These were the good old days! This dish is inspired by a French classic called ''Timbale de légumes". Originally served in small bite sizes, it is a hearty dish that is usually served with a salad. The chickpea flour makes this a very nutritional dish, high in protein. 

It can be served all year around, right out of the oven in the winter and cold in the summer. They are great for picnics too. You can keep these babies in the fridge for a week. You can make it in all kinds of fun shapes for creative visual displays (loaves, muffins etc). Make sure to include seasonal fresh herbs for a burst of flavor in every bites. I used fresh basil leaves this time.

   INGREDIENTS:

   3/4 cup garbanzo bean flour
   2 Tbl rice flour (optional)
   1 red bell pepper diced
   1 chopped tomato
   1/2 cup zucchini diced
   ½ cup bread crumbs
   1 Tbl olive oil
   1 Tbl tahini (sesame butter)
   Little water
   Fresh green onions, paprika, salt and pepper to taste
   5-6 leaves of fresh basil (optional)


PREPARATION:

   1) Preheat the oven at 375F, lightly oil muffin tray or ceramic cups
   2) Mix the dry ingredients in a bowl.
   3) Add the vegetables and mix with hands.
   4) Drizzle the olive oil and the herbs over and mix with spoon.
   5) Add a little water so that the mix is moist and holds together.
   6) Spoon the mixture in ceramic cups or muffin tray cups and flatten the top.
   7) Bake for 20mn
   8) Serve hot or warm

FUN FACTS ON GARBANZO BEAN FLOUR:
a) Mixed it with an equal amount of water and you have a perfect egg replacer that is gluten free.
b) Use it to create a crisp texture to parboiled vegetables by rolling pieces before pan frying them (potatoes, zucchinis etc.)
c) Ladies, how about a homemade exfoliant? 
Mix 4 tbsp of chickpea flour, a pinch of turmeric powder (optional) with a little water until you get the consistency of a paste. Apply to your face and leave it on to dry and then wash it off. You can do this while taking a bath for a special treatment. I like to add a drop of lavender for the super treatment. If  you use essential oil be careful, mix it with a little vegetable oil first to avoid burning your skin.

Tuesday, February 8, 2011

PIZZA SOPHIA

Why order pizza when you can make your own or tailor it to your taste? Because it is easier? Maybe if you are in a hurry but not if you get a little organized. Home made is not only cheaper but so much fun when you have friends over. Everyone can participate
and make their own creation. You can allocate various section to the pizza(s) to all kinds of creative arrangements. Then you can vote which one was the most popular.

I made a super "meaty" version for some guests we had over for dinner a while back. One of them, I knew was a major meat eater so I went all out with an array of vegie meats (vegie ham, sausage and ground meat). The result (see photo) was awesome and it was a great success. His son loved it and couldn't even tell the difference. Actually one of the greatest thing about veg 'meat' products is that no matter how much you are eating, you don't experience the usual digestive coma you get when you eat too much food with animal products in it. Plant-based is just lighter and so much easier to break down.

CAVEAT EMPTOR:
This being said, as with all good things, they should be consumed in moderation. Vegie 'meat' products are great for people transitioning to a plant-based diet, but because they are highly processed, shouldn't be eaten in large quantities and at every meal. A little goes a long way.

THE BASIC DOUGH RECIPE: This will make 3 12 inch pizza crusts

Ingredients:

1 TB dry active yeast
1 1/2 cup warm water
3 1/2 cup flour
1 Tbl olive oil (optional)
pinch of salt

Preparation:
  1. Put the yeast in a small bowl. Add the warm water and stir. Set aside for about 5 minutes.
  2. In a separate larger bowl, pour the flour. With your hand make a mound in the middle and dig a hole in the middle. Pour the yeast mixture, add the oil and the salt in the hole. Gently move the flour over the wet mixture and using your hands, mix to form the dough. You will need to sprinkle some flour on the working surface (a wooden board or clean counter will work fine). You can stop kneading when the dough doesn't need more flour and isn't sticking to your hands.
  3. Lightly oil a large bow with olive oil and place the dough in it. Score the top of the dough in the form of a cross to prevent cracking during the rising. Cover with a cotton towel and place in a warm area of the kitchen for 1-2 hours to let it rise.
  4. When the dough doubled in size, you can punch it down to remove the air bubble in the middle.
  5. Sprinkle flour on a working surface. Cut the dough into 3 equal parts.
  6. Start with the first one, you can use a rolling pin also lightly floured to roll it out.
  7. Once it has been flatten a little, you can use your hands to stretch it. I wouldn't try to flip it over your head the first time. Just hold it over the top of your hand and move it around gently where it is thicker until you have the right thickness.
  8. You can use a cookie sheet if you don't have a pizza pan. Depending on the size of your tray, you may need to use 2 dough balls to cover it all. 
  9. If you only want to  make one pizza, place the other 2 dough balls in a ziploc bag and freeze. Make sure to thaw them 6 hours prior to using them.
TIP: If you are in a hurry and prefer skipping this step, you can buy  already made pizza dough in the refrigerated section of Trader Joe. While you are at it, buy several packages and freeze them. They keep forever and are inexpensive. Stick to plain dough, there is an herbal one but it doesn't work as well.
TOPPINGS:
You can buy tomato sauce (plain, with mushrooms, basil, herbs etc.) or you can use pesto or both!
As a minimum I always have thinly sliced onions, some mushrooms, marinated artichoke hearts, pitted olives,
fresh sliced tomatoes, zucchinis and some vegie meat. Sprinkling some Daiya cheese at the very end will provide a nice melting effect. If you want to add fresh sliced tomatoes, only put them after the pizza is cooked, this way the slices are just warmed and not mush. You can also put some arrugula leaves or basil.

Other topping ideas:
Hawaiian: Use vegie ham and pinneaple.
Greek: use spinach, red onions and Calamata olives marinated tofu (as replacement for feta cheese) for a Greek version.